Photographing a Cozy Entrée for a Restaurant Menu
When planning a restaurant shoot, one of the most common questions I hear is:
“How many photos will I get per dish?”
The answer depends on your goals—but for most restaurants, the sweet spot is 2–3 images of each entrée. This provides enough variety for menus, online ordering, and social media without overwhelming your team with dozens of similar shots.
Today, I want to walk you through a recent example to show you exactly what that looks like.

The Dish: A Cozy, Flavorful Entrée
For this session, I photographed a single bowl of sticky sesame cauliflower over rice—a rich, comforting dish full of color and texture.
Because this was part of a pretend restaurant menu, my goal was to create images that felt warm, inviting, and consistent with a modern, moody style.
What to Expect When I Photograph One Entrée
When we’re capturing multiple dishes in a single session, I typically create:
A Hero Shot: A 45° angle that shows the dish clearly and feels approachable—perfect for the website or print menu.
An Overhead Shot: A clean top-down view to highlight presentation and portion size.
A Detail or Action Shot (optional): A close-up bite or garnish moment to add life and visual interest, ideal for social media.
This approach is efficient while still giving you flexibility in how you use the images.
The Process in Action
Here’s how the shoot came together:
1. Styling & Setup
I kept the scene simple:
A neutral linen backdrop
A handmade ceramic bowl
Chopsticks to bring movement and context
Because this dish has so much rich color and texture, I didn’t need extra props. The food itself was the star.
2. Lighting
For this session, I used a single diffused light source to create soft shadows and depth.
3. Capturing the Shots
I photographed three main angles:
Hero (45°) with chopsticks lifting a bite – Dynamic and engaging.
Overhead – Clean and descriptive.
Detail (optional) – A tighter crop of the sesame garnish and sticky sauce.
This workflow keeps each dish moving quickly so we can cover your entire menu in a single day.
The Final Images

The Hero Image
A clean, versatile shot of your dish that can be cropped to different aspect ratios depending on where you want to use it.
1:1 – Perfect for social media and food delivery apps
3:2 – Ideal for websites, menus, and print marketing
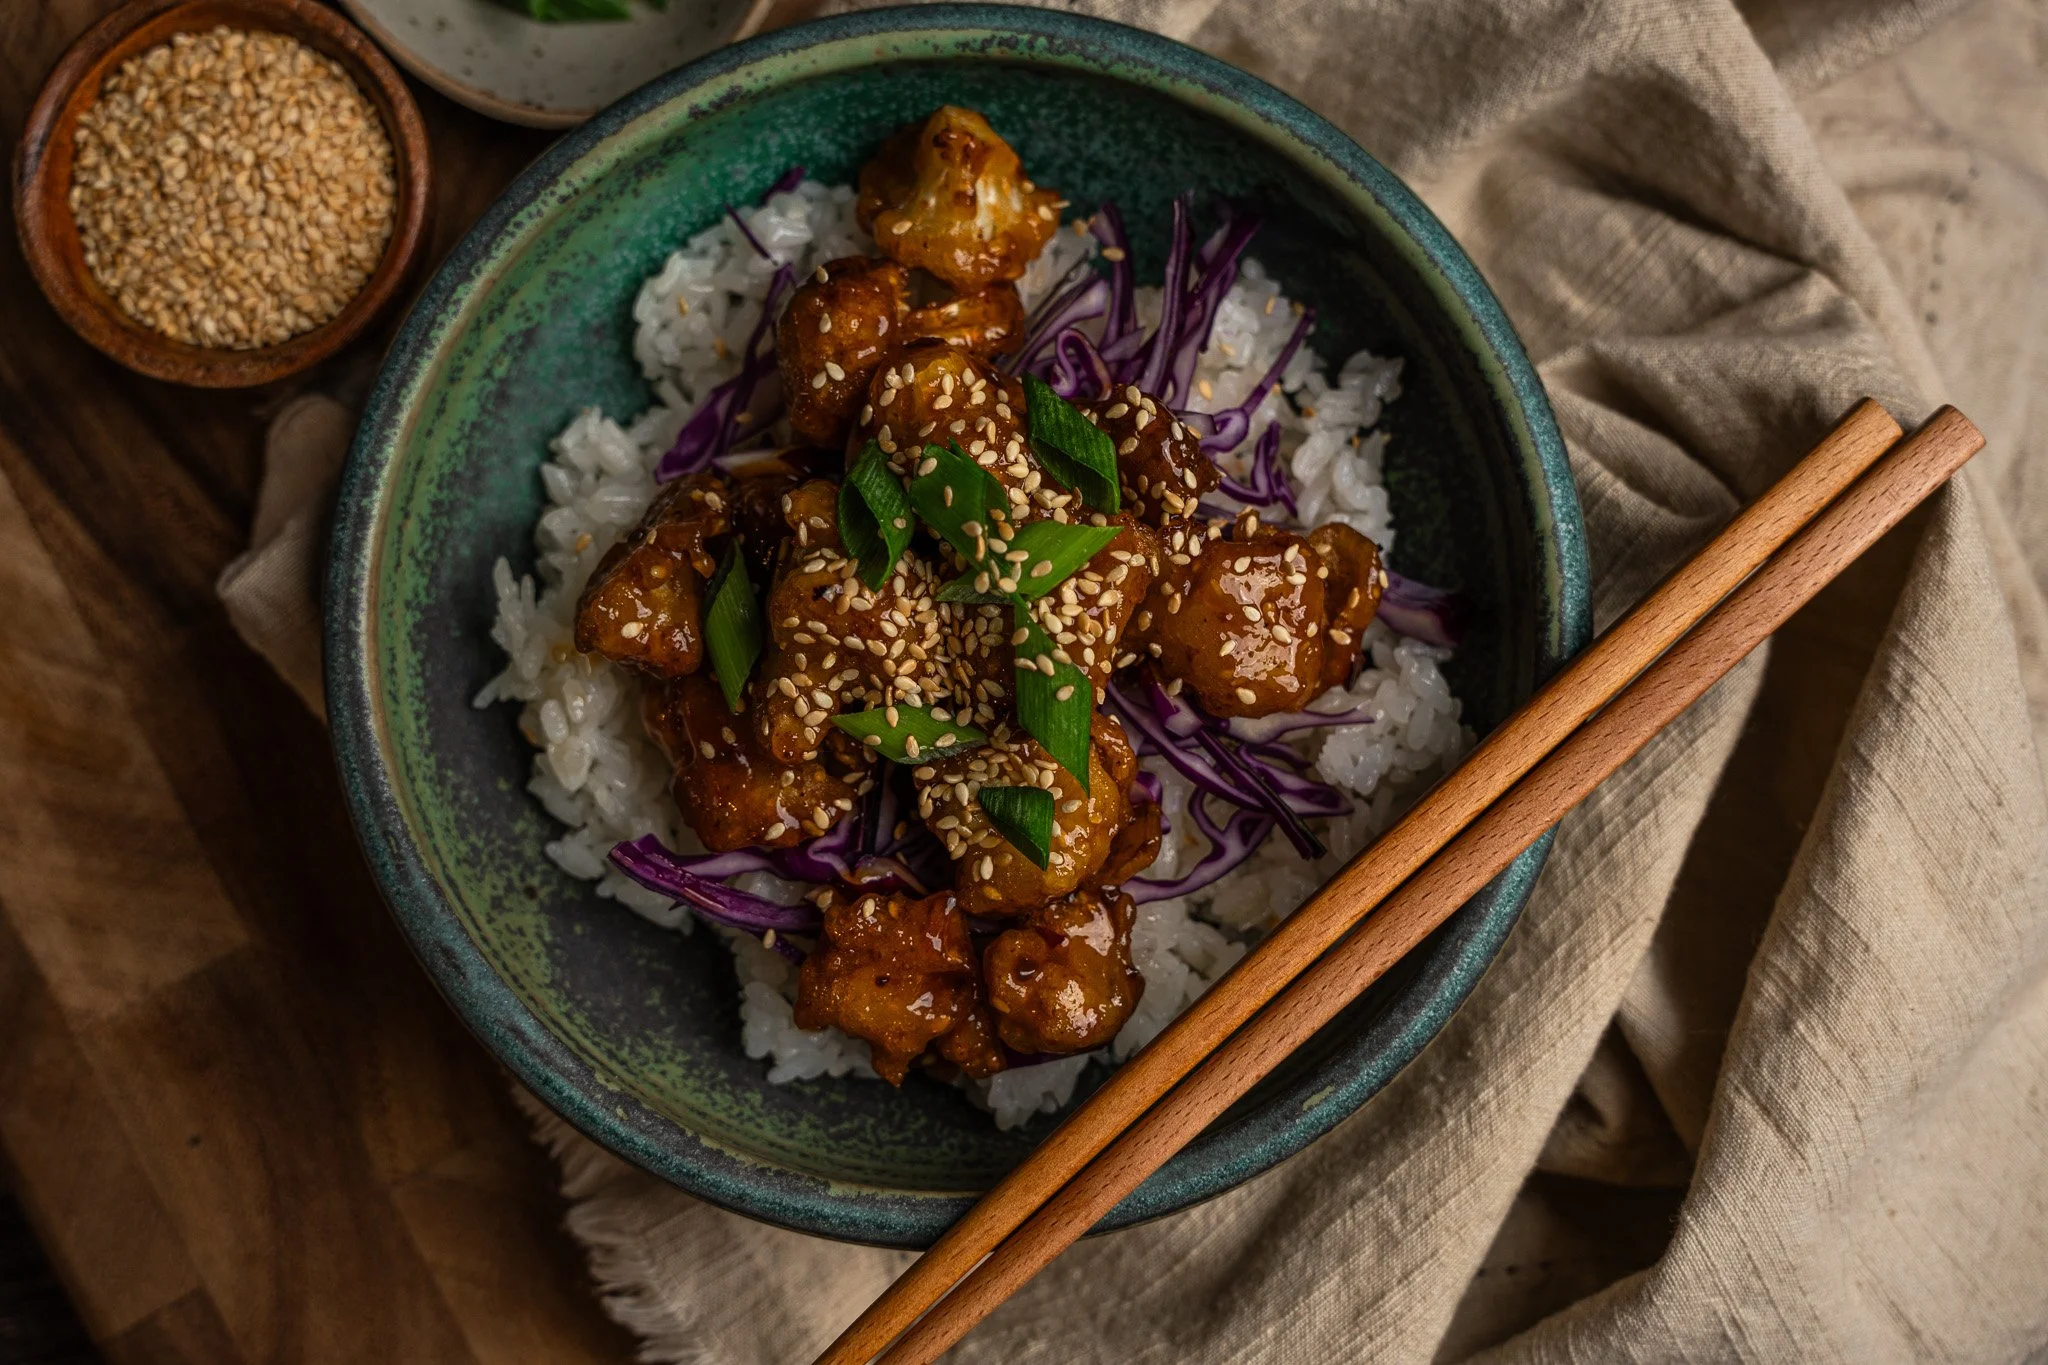
The Overhead Image
An overhead angle that shows the full composition of the dish. This style is perfect for highlighting plating, portion size, and all the colorful details that make your food stand out.
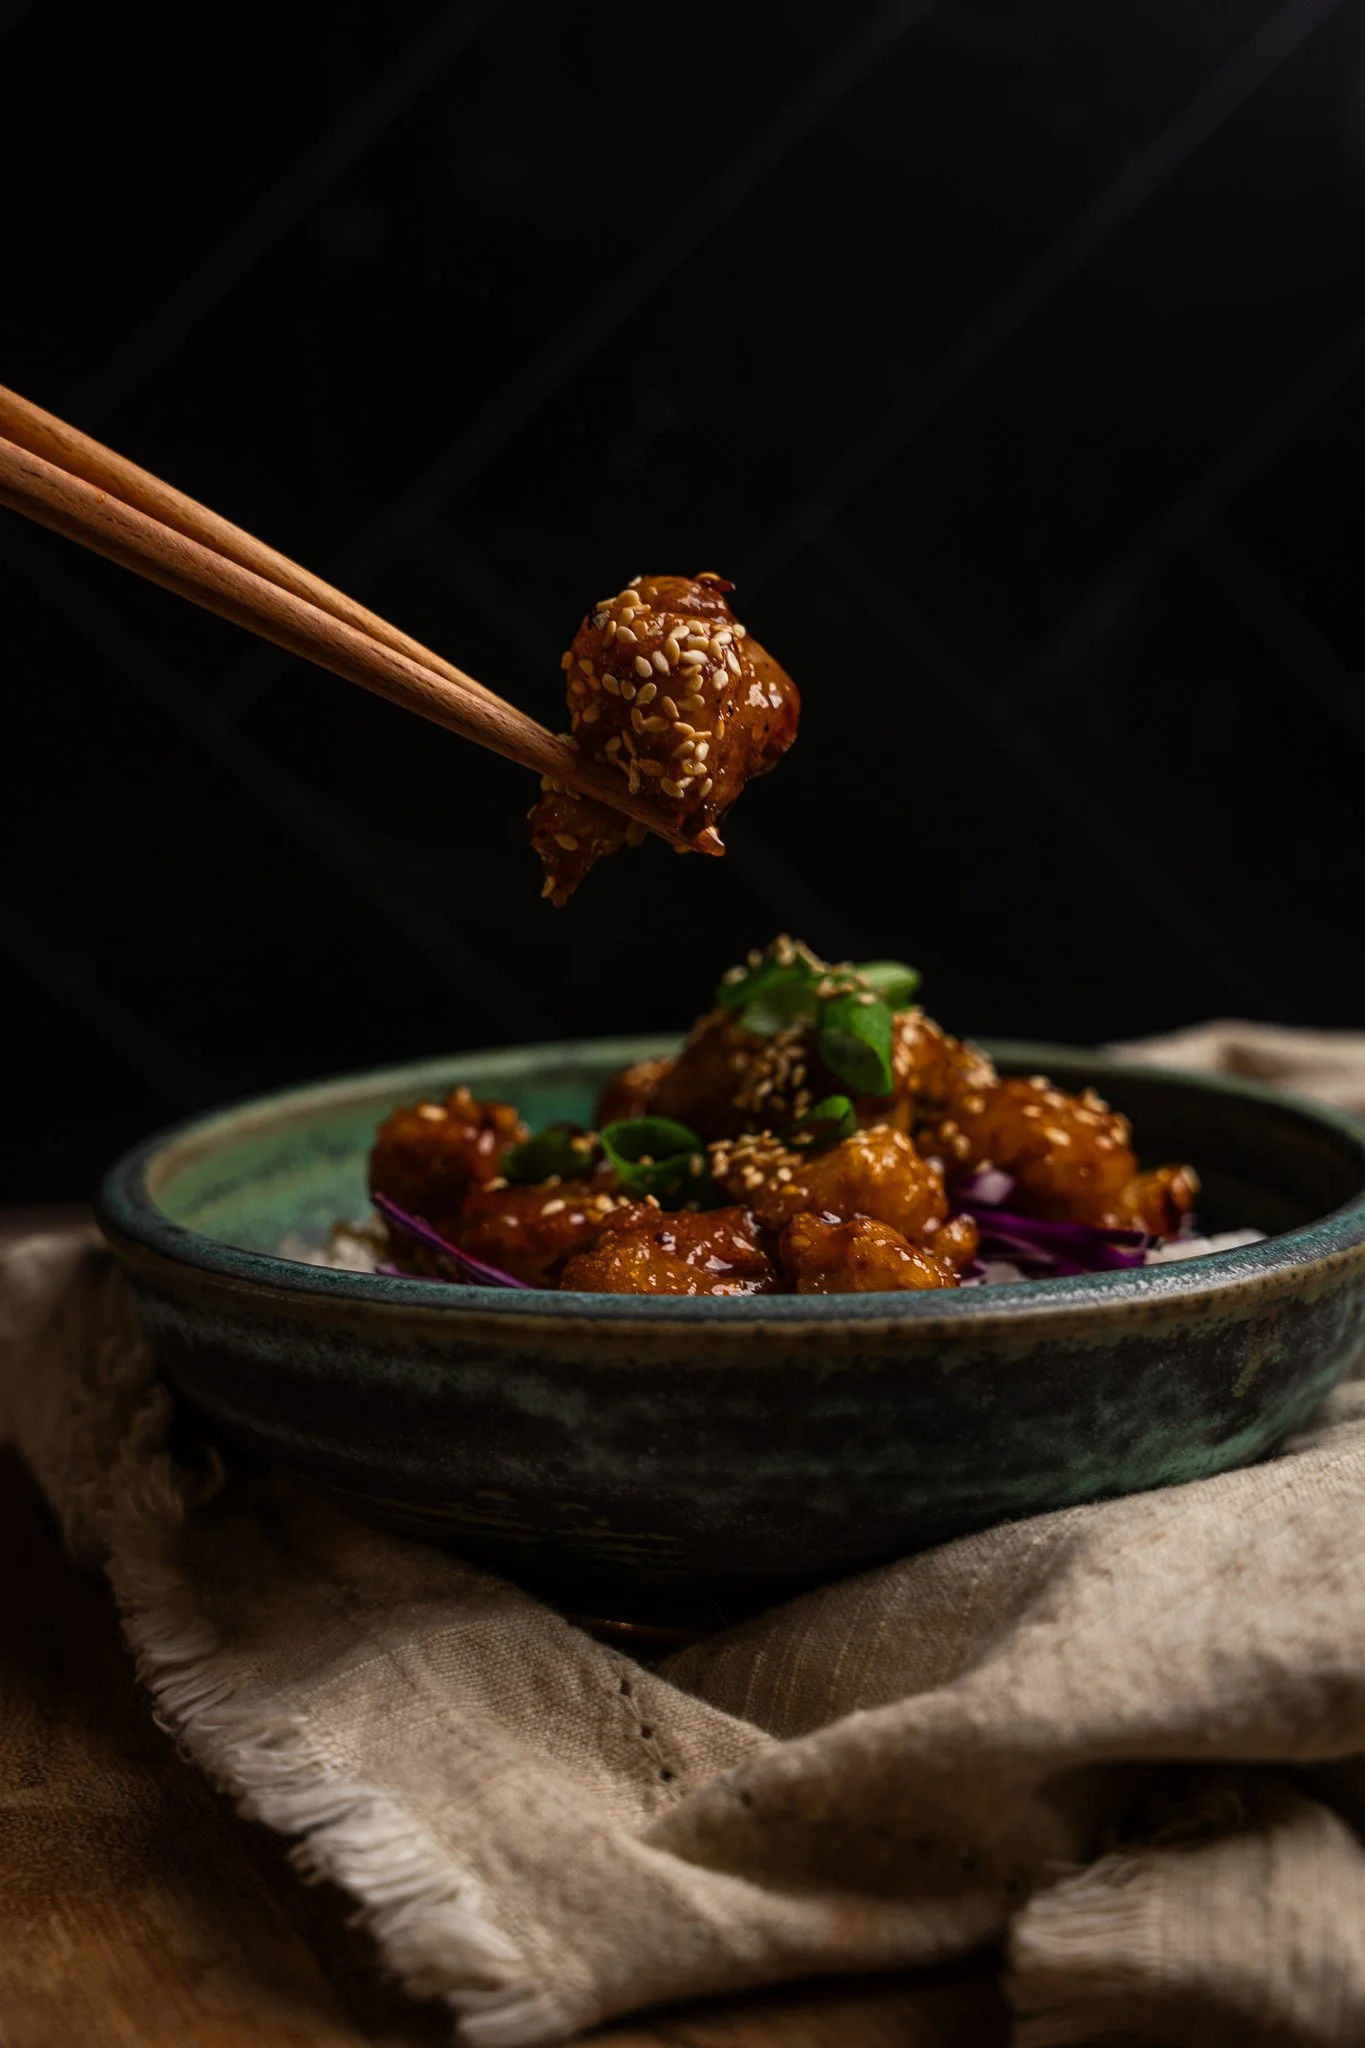
The Bite Shot (Optional)
A dynamic action shot that showcases the texture and delicious details of your dish. Perfect for adding movement and helping customers imagine taking that first crave-worthy bite.
Why This Approach Works
When you’re running a busy restaurant, you don’t need 15 photos of every dish. You need:
Consistency
Variety of angles
A clear, appealing representation of each entrée
This 2–3 image system delivers exactly that.
Ready to Elevate Your Menu?
If you’d like to showcase your food with professional, mouthwatering photography, I’d love to hear more about your vision.